So for many woodworkers, myself included, one of the first serious rites of passage is building your own workbench. I’d been using my trusty Black and Decker WorkMate for probably 10 years and it has many qualities but big and sturdy is not foremost amongst them. So once the workshop was in a reasonable state of completion, which for me was floor, back wall and ceiling painted and electrics complete, it was time to start building my first workbench.
Design
This was a project I’d been thinking about for quite a while. Since I’d done a 5 day beginners woodworking course at Peter Sefton’s Furniture School in fact. As part of the course Peter gives us all an plan for a basic workbench which served as the inspiration for my own design. I also watched a few Paul Sellers videos and excellent as they are, were a bit more work than I was intending. Probably my next bench will follow a similar build though.
I had some nice 3/4″ B grade birch ply and asome 3/4″ OSB left over from previous projects and decided that would make a servicable worktop. A laminated top appealed but was a lot more work and speed trumped desire for this project.
My workshop building expeience had all been with CLS graded softwood so that seemed a good place to start for the trestle stretchers and in the end the only 100mm square posts I could get were fencing posts so that decsion made itself.
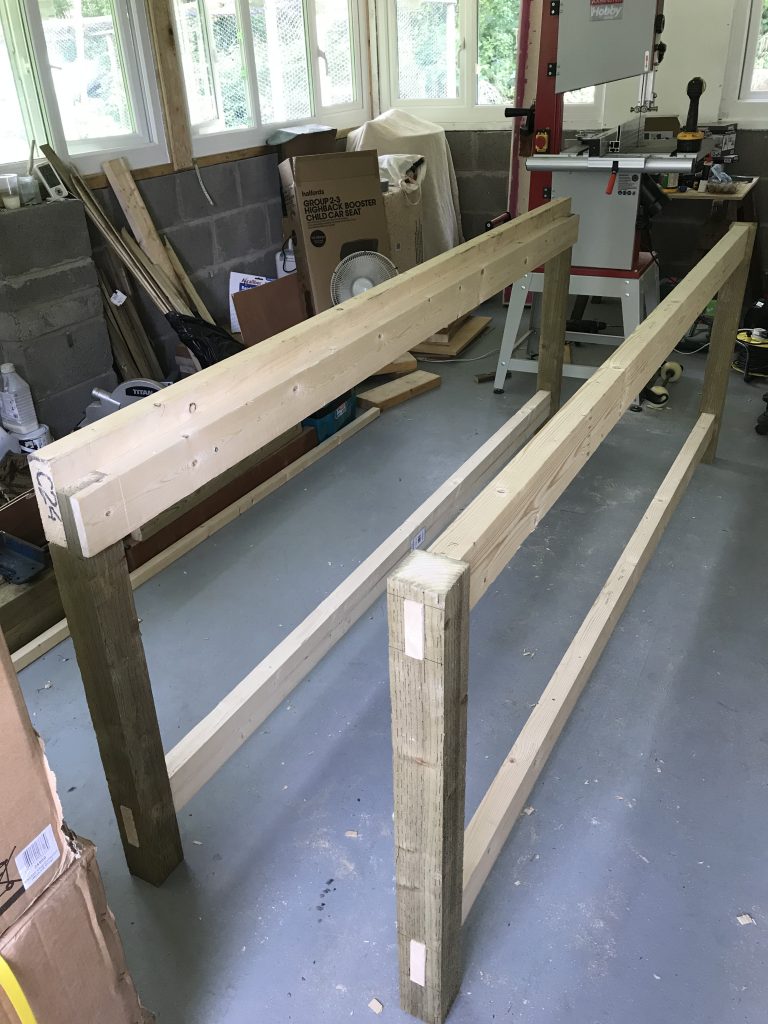
The trestle design front and rear seemed releatively straightforward and meant I could use some good timbers in the plane of the most deflection. It also had a modular element tot he design which made manufacture and erection a lot easier, and importantly within my skill level.
Construction
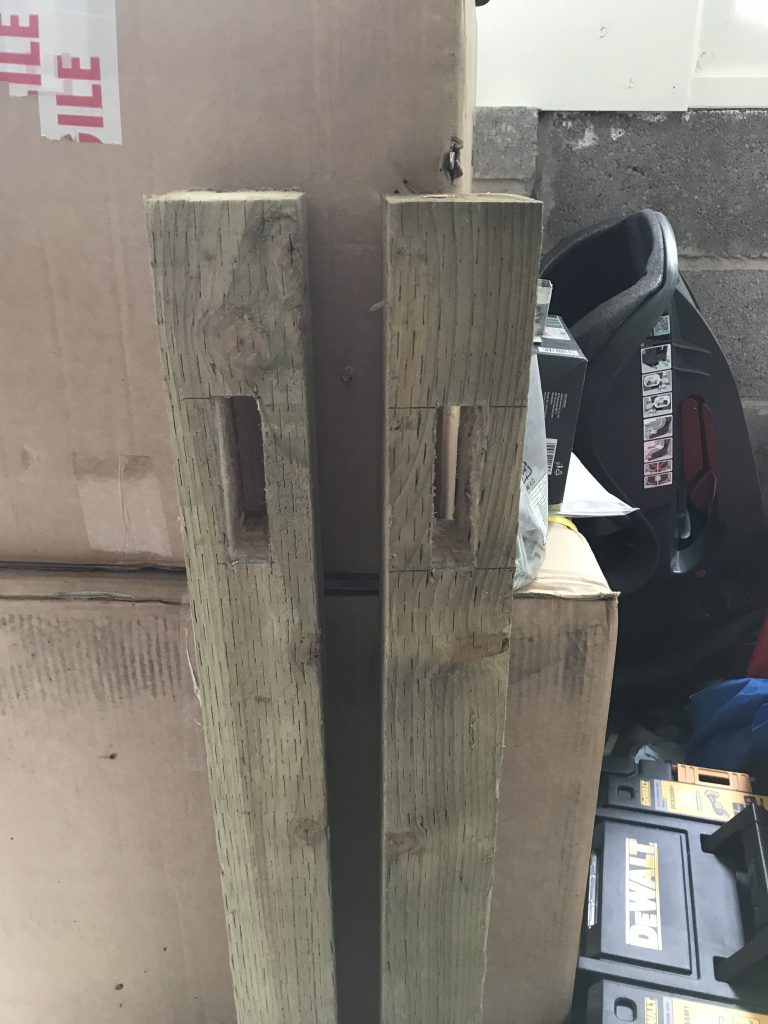
I began my construction by making a pair of trestle legs. All 4 uprights were made from 100mm square treated fence posts, chosen because they were easy to source and cheap. I’d probably make up some laminated legs from 2” by 4” hardwood if I was repeating this though. Both trestles have a lower stringer joined to the leg with a tenon and mortise. The rear upper is done the same. The front upper stretcher is a simple lap joint. The front upper also has a skirt. The stretchers are all 2” by 4” CLS and the skirt 2” by 6” CLS.
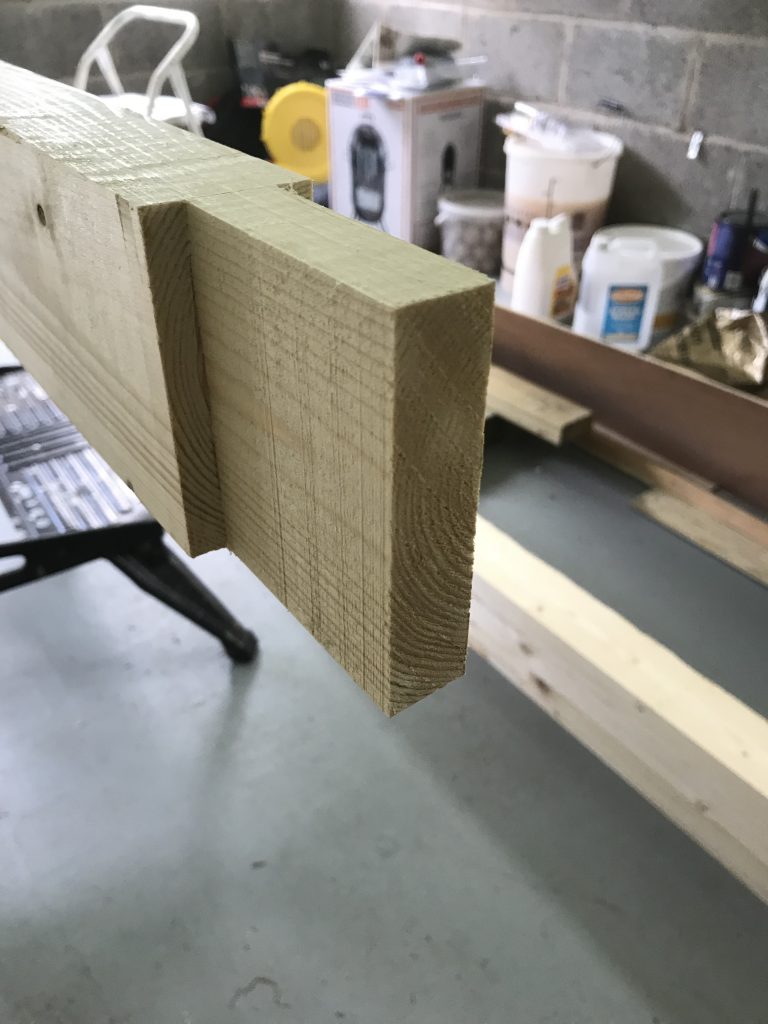
The tenons were cut on the band saw, at 8’ long this made alignment great fun. But it made for a very neat cheek on the tenon which needed little work to get a good fit with the mortise. The shoulders were hand cut with a tenon saw.
Aligning the 8′ stretcher with the band saw took a little bit of ingenuity but got there in the end . Whilst my home brewing may not be progressing much my Youngs small fermenter and trusty, or should that be rusty, old WorkMate might have been made for the job. Now as a former turbine engineer I can say it was better aligned than most of the 500MW units I’ve ever seen.
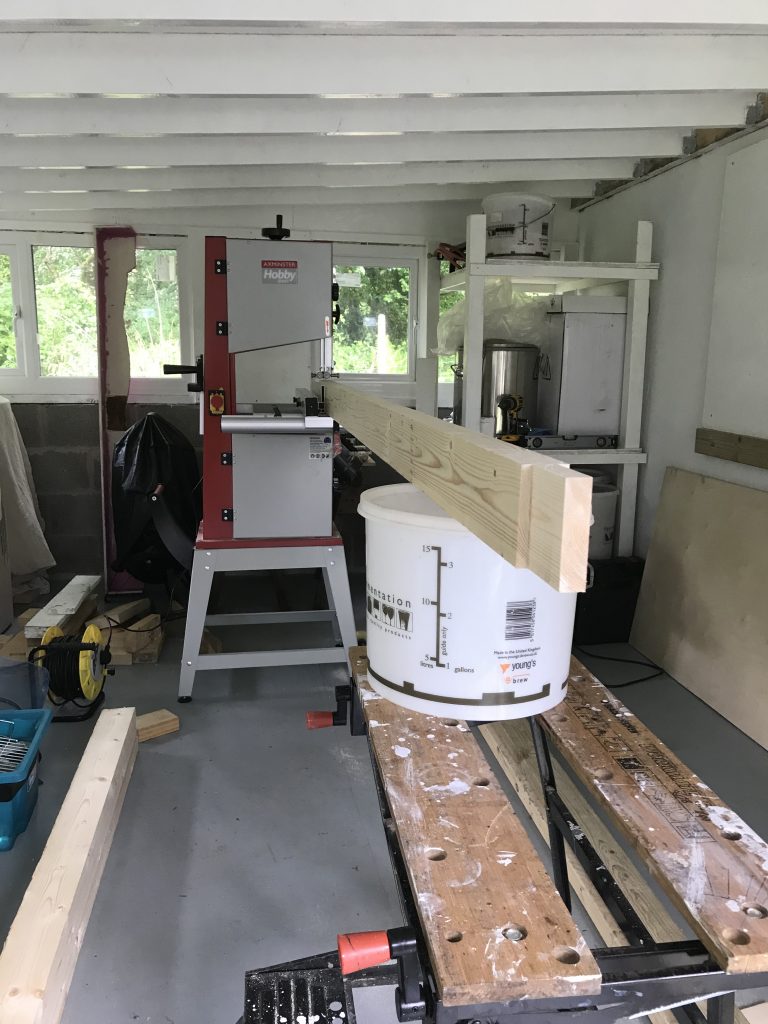
The band saw is a new toy I got for the workshop this year, Axminster subsequently discontinued the range when they updated their Craft and Trade ranges towrds the end of 2018. I waited until I’d been on Peter Sefton’s 2 day wood machining course before buying that and I’m quite pleased with it. Most of my fellow attendees were buying or already owned thousand pound plus semi professional models or were iminently to buy so I had to ask Peter on the quiet about what features a more modest investor might buy. He was very helpful and sympathetic. if you ever fancy learning woodworking on a short course, though seemingly expensve, his courses are excellent and worth every penny.
Cutting the mortises in the fence post legs was a challenge, especially as I wanted to make a relatively neat job of it. The wood didn’t cut especially cleanly not aided by the treatment slits. My cheap and damaged chisels could have been better prepped. I cut the by hand on both sides of each post then used a drill to cut material out once it was well started. In the end they turned out pretty neat and the cheeks of the tenons fit quite snuggly.
I’ll cover assembly in my next post.