
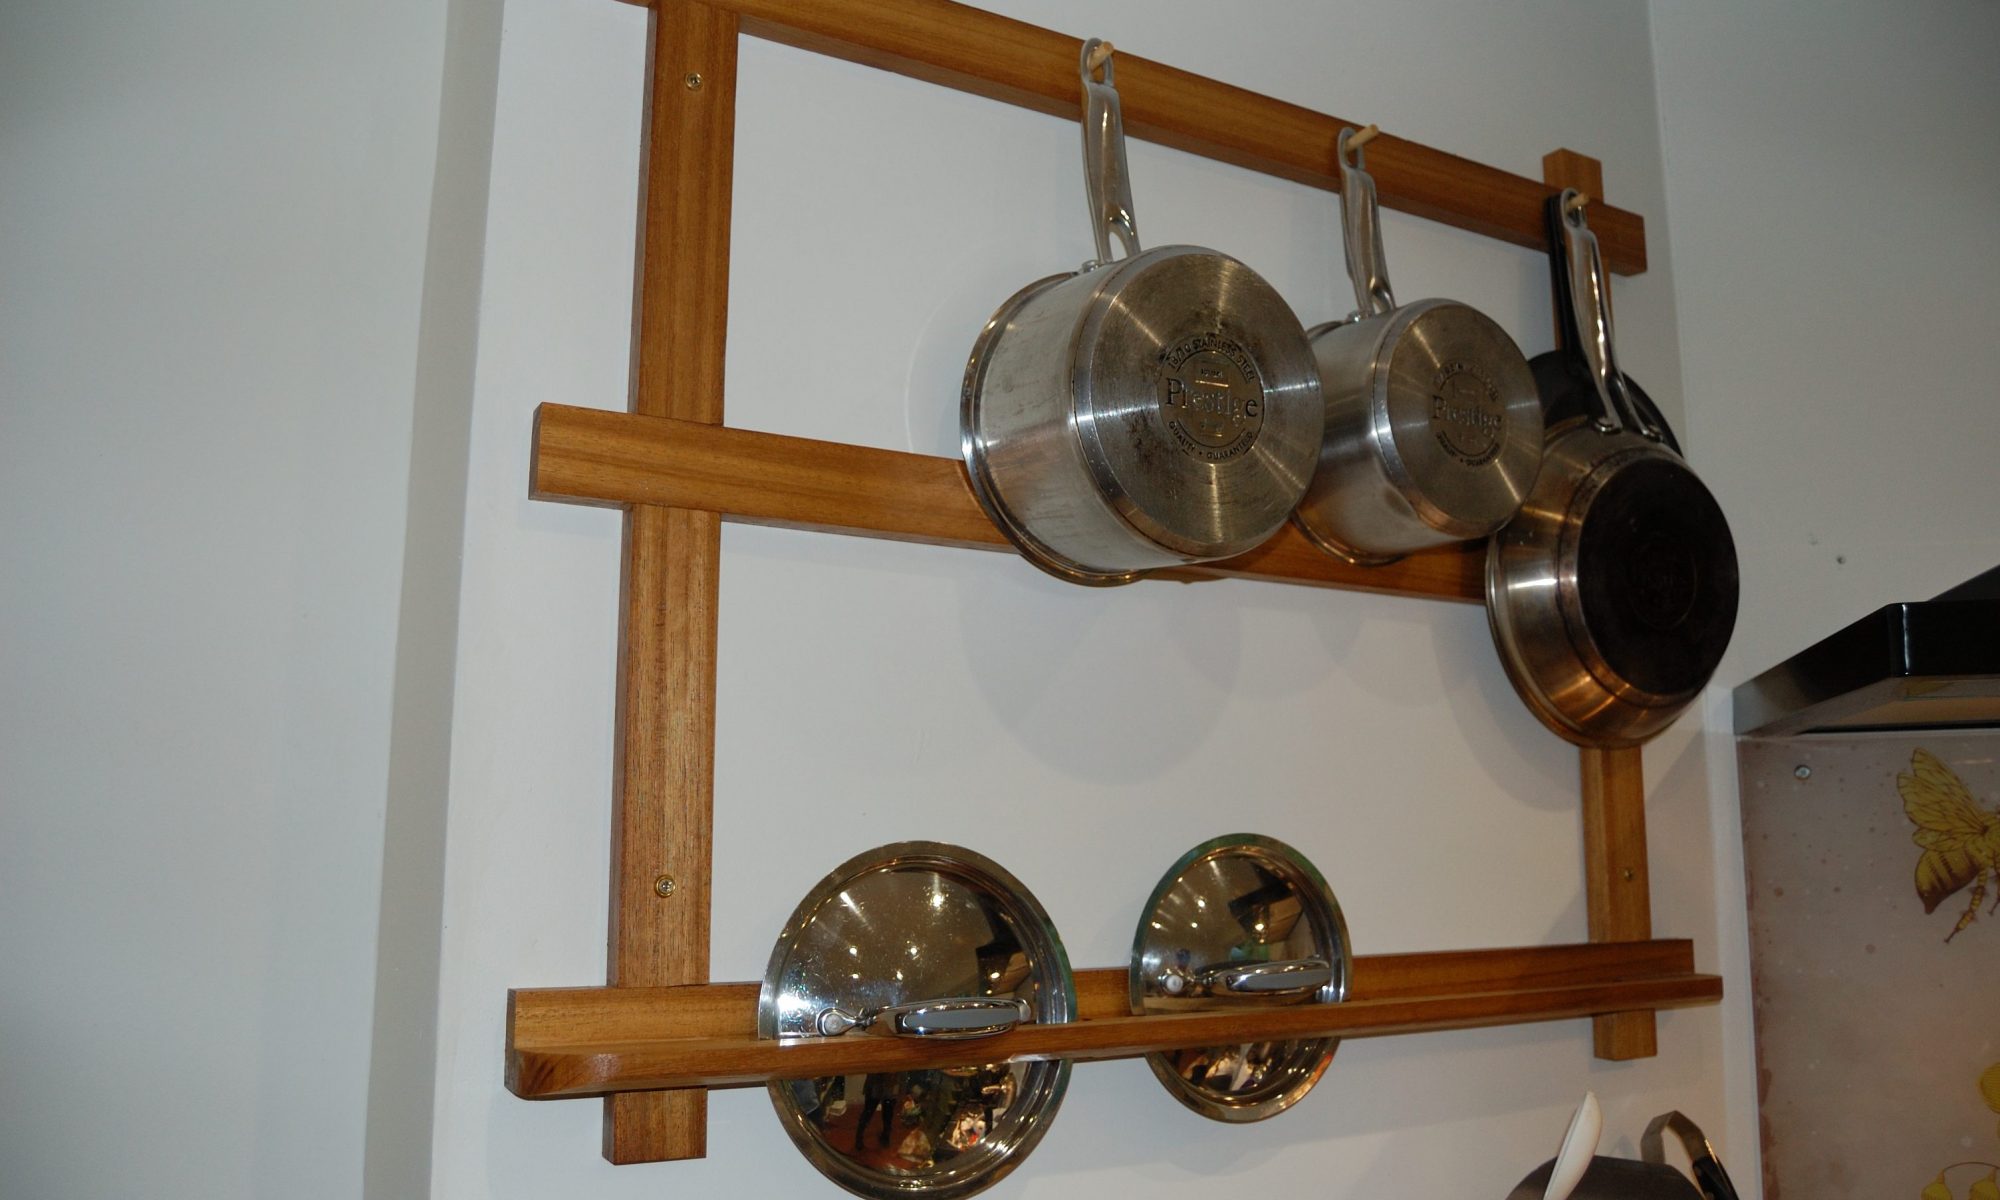
One of this years projects has been stripping out and rebuilding the kitchen which has taken much of my time but been an enjoyable task. The main purpose being to refresh the room but also make it much more usable. A small addition to the project has been a home made pan rack to get the pans out of cupboards and into a more ergonomic location.
Designing the Pan Rack
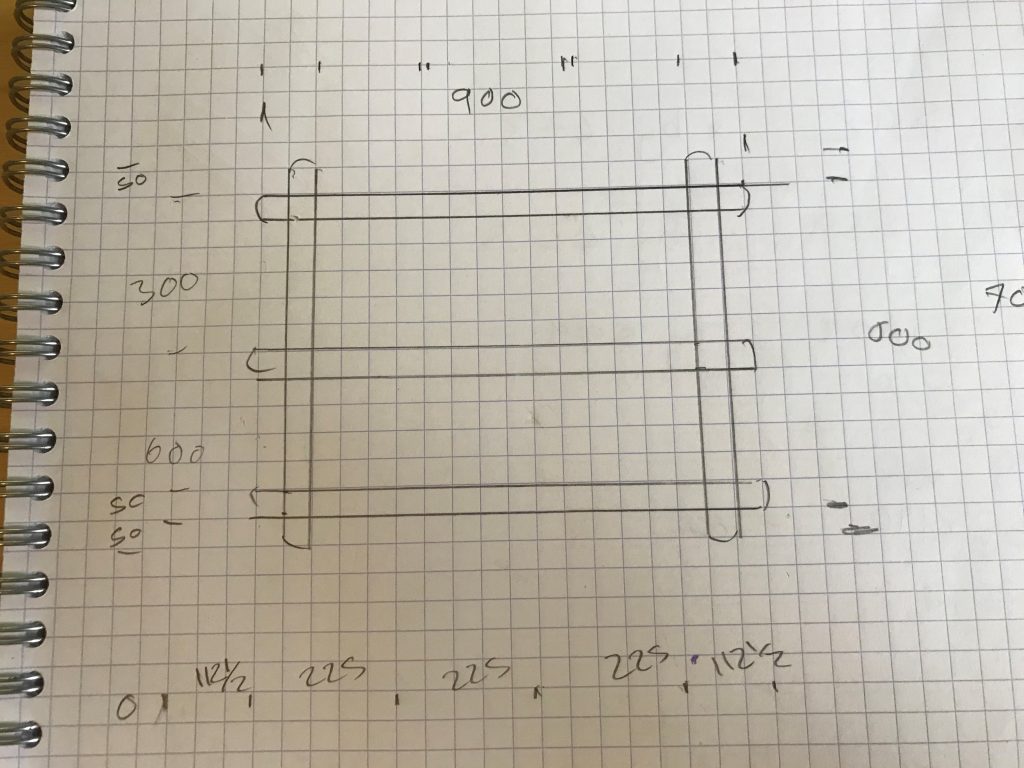
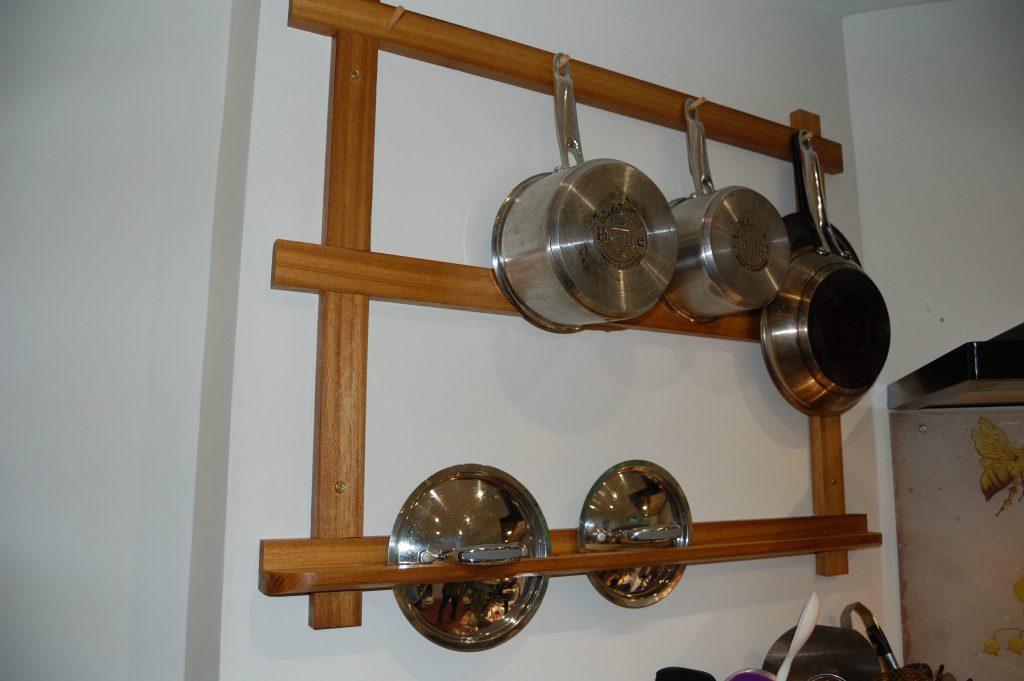
So I had this idea to produce a simple wooden frame with a pegs to act as a pan rack that I could hand my stainless steel pans from but also support the pans lids. I purchased a piece of irroko wood from the Timber Merchants and used it’s approximate dimensions to inform my design. I ultimately settled on the proportions below. My key aim was to ensure it was wide enough I could equally space 4 pegs for the pans to hang from and 3 slots for the lids to sit in. In addition I wanted all the pans to rest against the middle cross bar rather than touch the wall. I mostly worked this out by laying the pans down and messing around with the positions until the spacing seems right.
Re-sawing The Wood
I picked up a piece of irroko from my local timber merchants who recommended it as being more moisture tolerant than oak. Given that it was going in the kitchen this seemed like advice worth following. In addition I found the colour more appealing as well.
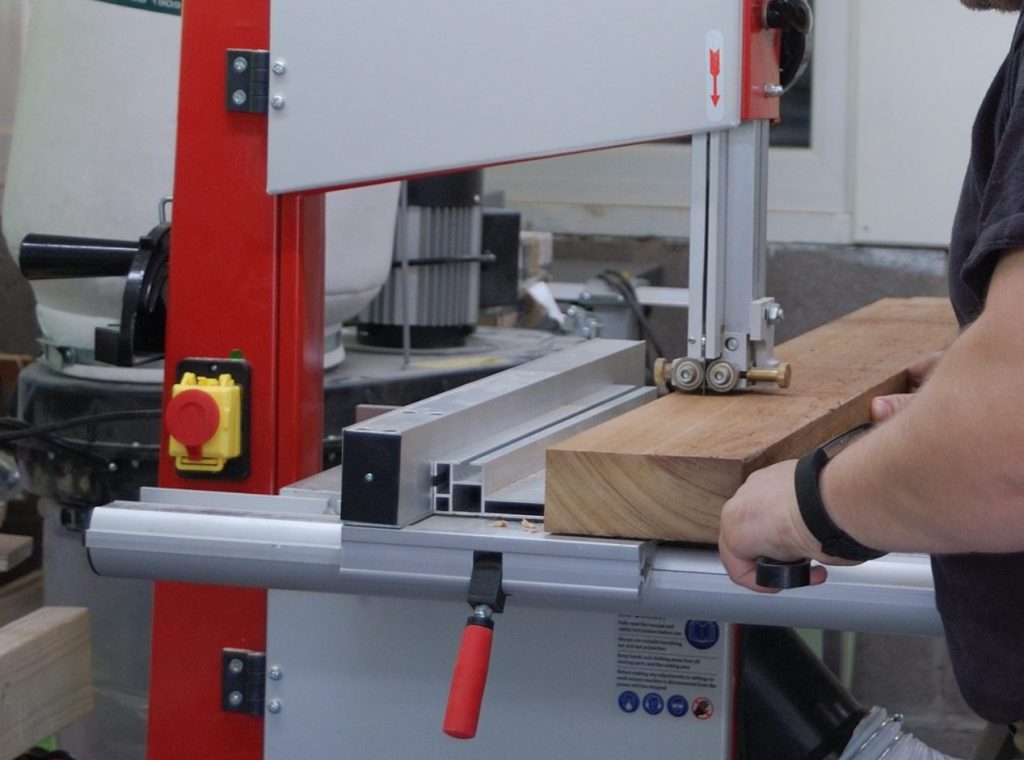
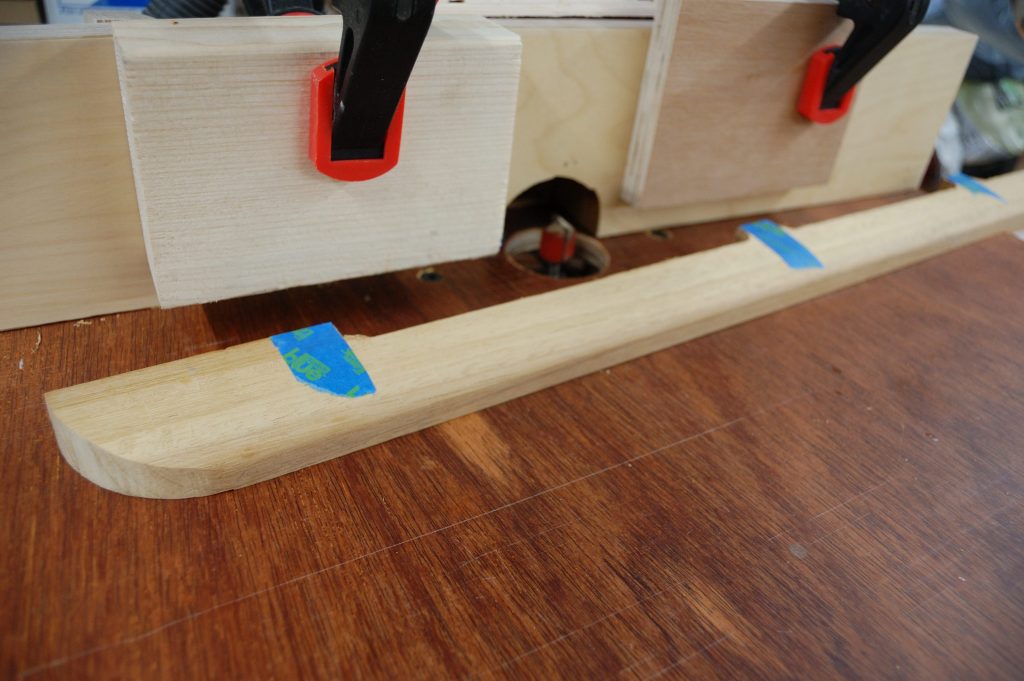
The first job was to cut the wood down. The piece was about 65mm thick and 200mm wide so a good starting point for cutting the 50mm by 20mm strips I was planning on using. I have a now discontinued Axminster HBS310 bandsaw, it’s not large but there is some decent engineering in it. The saw coped well so long as I kept the feed rate down and I soon had the 6 blanks I needed for the rails, stiles and lid holder. I don’t claim any great proficiency with the bandsaw but it has become a very useful tool to me over the last few years. In particular ripping down larger pieces of wood into useful blanks.
Preparing the Wood
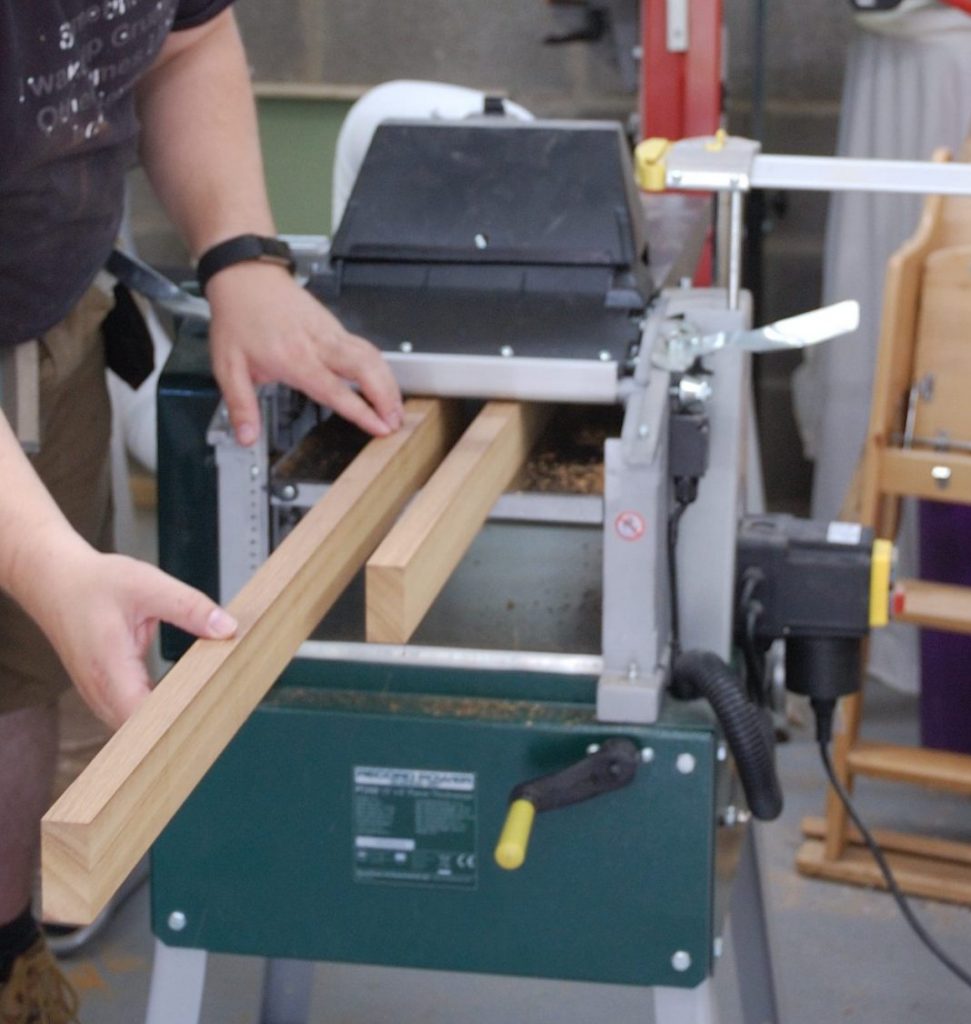
My next task was to plane the strips flat and then use the thicknesser to get my final dimensions. For this I have Record Power PT260 planer thicknesser, it’s a nicely sized hobbyists machine. It planes and thicknesses although it requires a little dismantling and resetting to move from one mode to the other. In general I have found it and easy machine to use for a relative novice like myself.
I started by setting the datum faces and ensuring they were square to each other using the planer. Once I was happy with these I marked up the datum faces and used the thicknesser to bring them down to my final dimensions which were 50mm by 20mm. Which is quite a fun task in its’ own way. The chatter of the blades as it takes the wood off and the pull of the rollers as they drive the pieces through. I doubt I’m alone in enjoying this.
Assembling the Pan Rack Frame
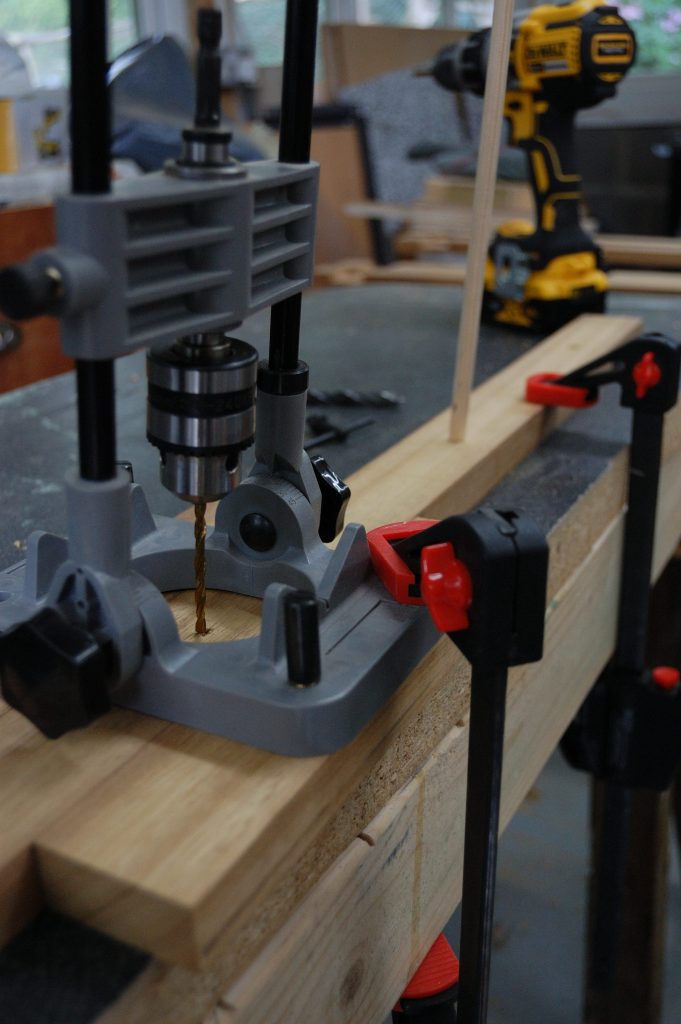
Once I was happy with the pieces I cut them down to length. Next I drilled my peg holes as I figured this would be easier before further work. I used a small drill guide set 5 degrees off perpendicular. My intent being that the pegs wouldn’t allow the pans to slide off but not such and acute angle that deliberately getting them off became difficult. The finished result seems to have justified this choice. Now I did think about making some pegs from irroko but put this in the unnecessary faff category. Instead I used some dowel that I cut to length.
Despite my unconscionable lack of photos I used my router to cut the dadoes for my lap joints. I used a simple straight cutter and some guides and cut all the rails in one go nd all the stiles likewise.
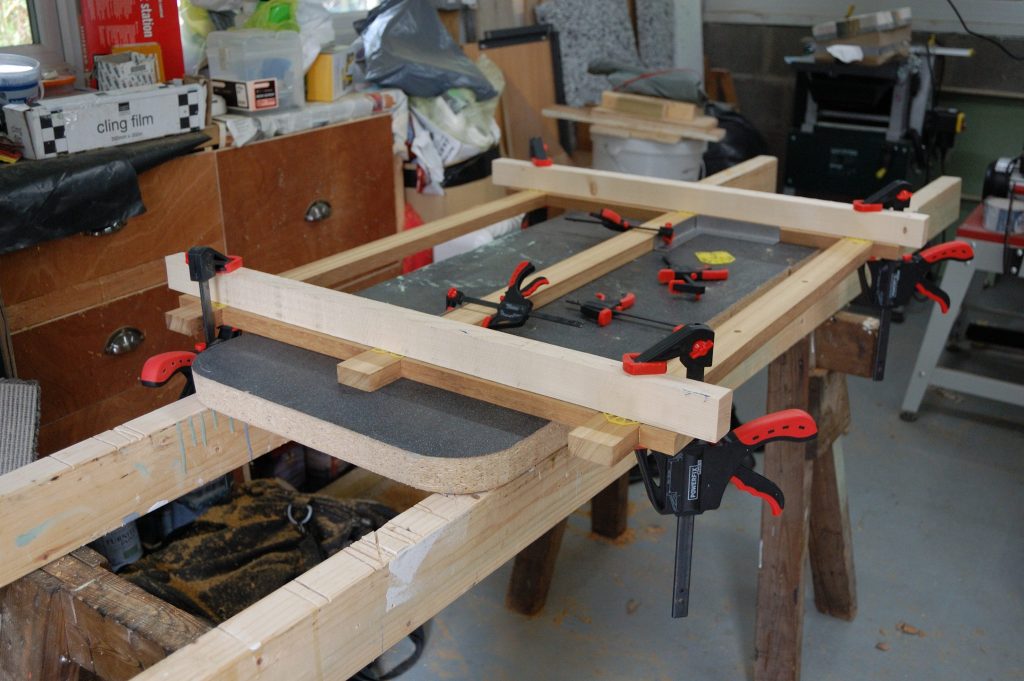
Once the lap joints were cut I glued them together using a few bits of spare PAR wood as strong backs and some shims to ensure compression. I find the glue up to be both fun and stressful. Fun because who doesn’t like making a mess and seeing glue squeeze everywhere and stress because it’s that stage where you’ve really committed yourself. Anyway it went well and the joints were pretty good. I only had to do a small amount of planning to get them all flush.
Making the Lid Rail
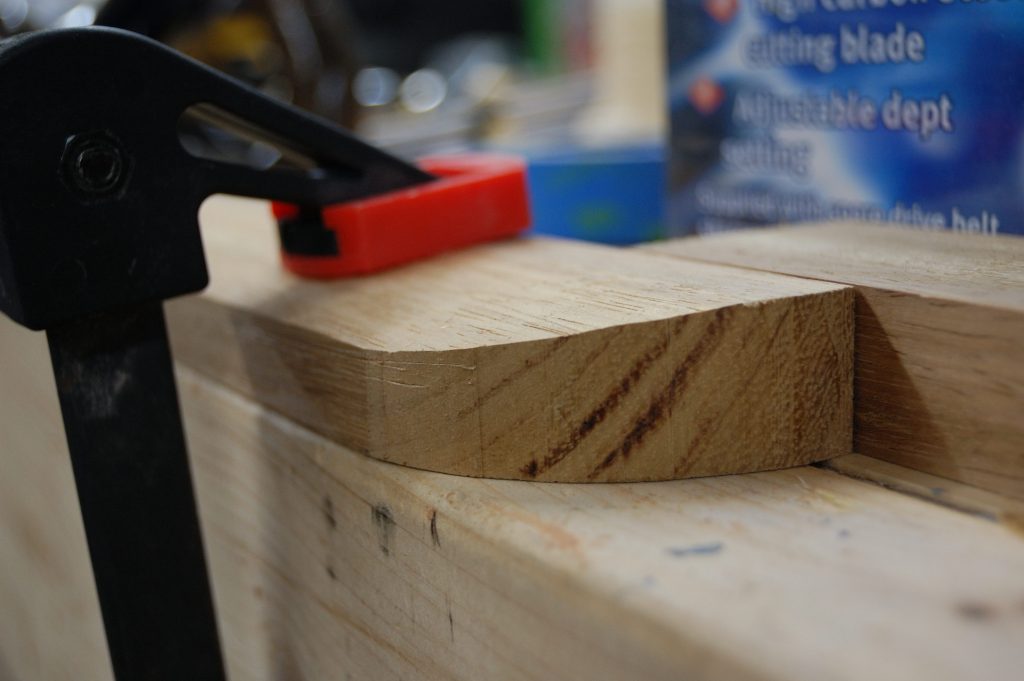
The lid rack was a topic of some discussion between EmmCee and I. I was worried about the thickness of rail aesthetically and strength wise. I wanted the pan rack to look right but I couldn’t really afford for it to break either. Our final choice was a tapered rail as it projected out from the rack. This gave enough wood to ensure a good joint at the rail edge but a pleasing aspect as viewed from the front. The lid rail was cut to length and I once again used the bandsaw but this time to cut the rounded ends. Then I got out my trusty No4 hand plane, marked up the bevel I desired and started making a mess.
I was pleased with how this turned out. Now it is possible I could have done this on the bandsaw but I’ve never been that comfortable with angling the table. And if truth be told worried about chopping my fingers off whilst doing so. The plane also let me approach the final shape slowly and I actually stopped short of my intended taper. Which I guess vindicated that decision. Have I told you how ace I am recently.
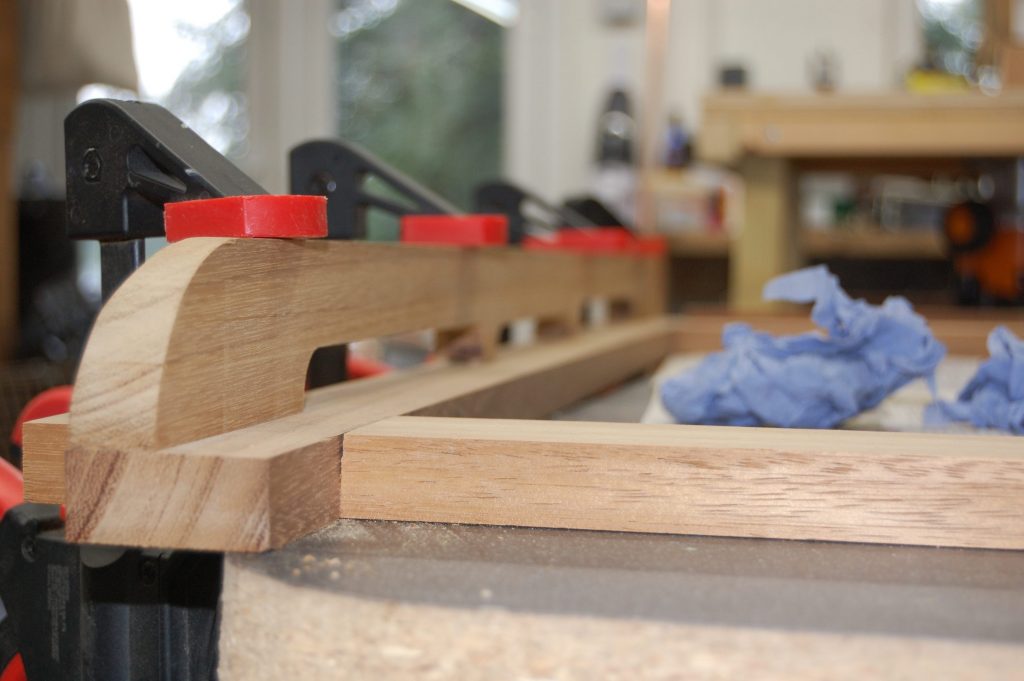
The final stage of the lid rail was to cut out some slots for the lids to drop into. I measured up the lids against the rail, marking where the rail would attach to the rack. Then I transferred the piece to my router table and as carefully as could used a straight cutter to scallop out the slots. I did cut the slots to different depths to ensure the lids would sit nicely. Or at least that was the plan.
Final Assembly and Finishing
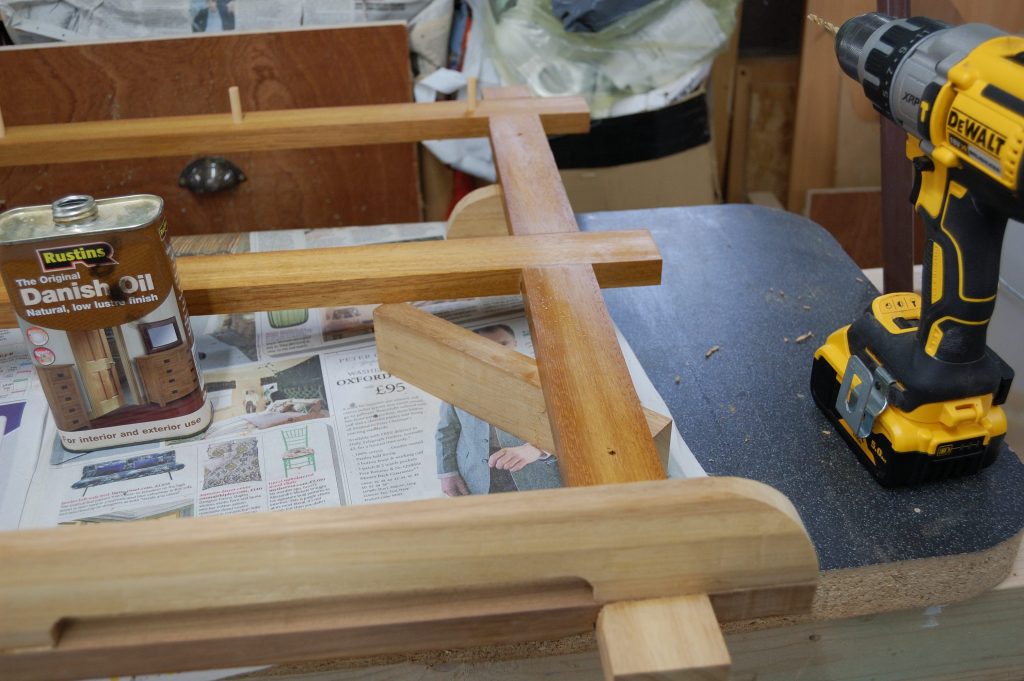
Finally I glued and screwed the lid rail to the pan rack being careful no to split anything. Which of course I did. Once of the thinner section slit despite my care and drilling pilot holes. I glued this back together and seem to have got away with it.
Everything got hand sanded down to 600 grit which left a lovely soft finish. A quick clean followed and then 3 coats of Danish Oil. Now I know very little about finishes but Danish Oil is food safe, easy to use and gives a decent degree of water proofing. In this case it also really enhanced the colour of the wood making the pan rack a lovely rich golden brown.
Installing the Pan Rack
Quite some thought went into fitting the pan rack. In the end I decided to use “brassy” screws with “brassy” cup washers. I think ideally some vintage style brass screws would have fiished the look. but that was in the too much effort box. So I played around with screw size to get an aesthetically pleasing head cup combination and drilled some clearance holes.
Next EmmCee and I offered it up, messed around with the positioning. Especially in respect to the wiring before settling on it’s position. I dabbed a drill through the clearance holes, removed the pan rack and drilled the holes for the wall plugs. A sentence which takes about 100 times less times to say than it does to do. Finally I screwed it in place all the while praying to the God of Alignment whom I have named Catenarius in honour of may days as a turbine engineer. The household gods suitably assuaged up it went and right first time.
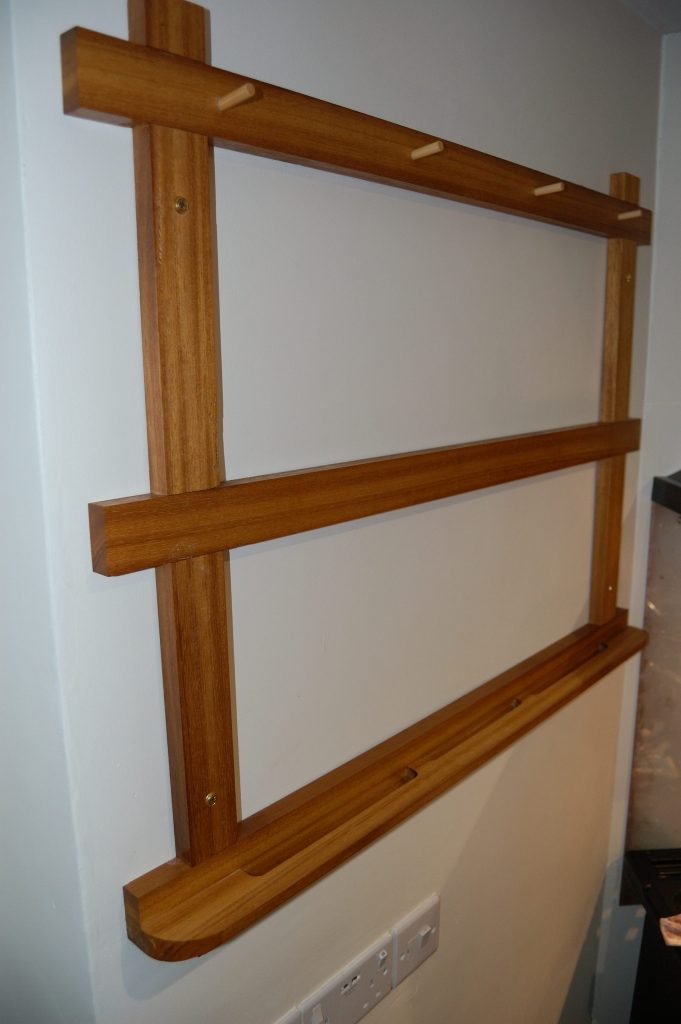
The final pan rack has proven to be very ergonomic to use. The pan height, the accessibility of the lids and the use of the wall for storage has all be good. I’m really pleased with the final result. Although I see the errors in it, it works well, looks good and was enjoyable to make. Which is what it’s all about really.
Other things I’ve made can be found here.